DISCLAIMER: As an Amazon Associate, I earn from qualifying purchases. Mostly Harmless may receive a commission at no extra cost to you. Thank you for your support!
The Creality CR-10 V2 is definitely a little dated now, but it is still a functional, if more basic printer. We originally purchased this printer at the beginning of Covid, some of my sons high school classmates got together and started printing face shields for local medical professionals when there was a mass shortage of PPE (there’s an article about their efforts in the Austin American Statesman). My son was sleeping on the couch, with an alarm set literally every 35 minutes to kick off new prints on his Ender 3, so we added the CR-10 to help increase productivity.
This post details some of the enhancements we’ve made to address some of the printers limitations.

Raspberry Pi 3B running OctoPrint:
This one is pretty much essential. Running back and forth with an SD card every time you want to print is just a pain. A Raspberry Pi 3B is more than up to the task, you don’t need anything faster. Ours is set up to boot from an old Western Digital HDD (in a custom 3D printed case). The Pi has a static IP address, so anyone on our network can go to http://cr10:5000 in their browser and view/manage the printer and library of prints. I’ve also configured the OctoPrint plugin to my slicer (UltiMaker Cura), so I can kick off and monitor prints directly from my slicer.
OctoPrint also supports a Raspberry Pi camera to remotely monitor the print jobs, but we haven’t gone that far. Yet.
Details of OctoPrint can be found here. It’s fast and easy to set up, and it just works.
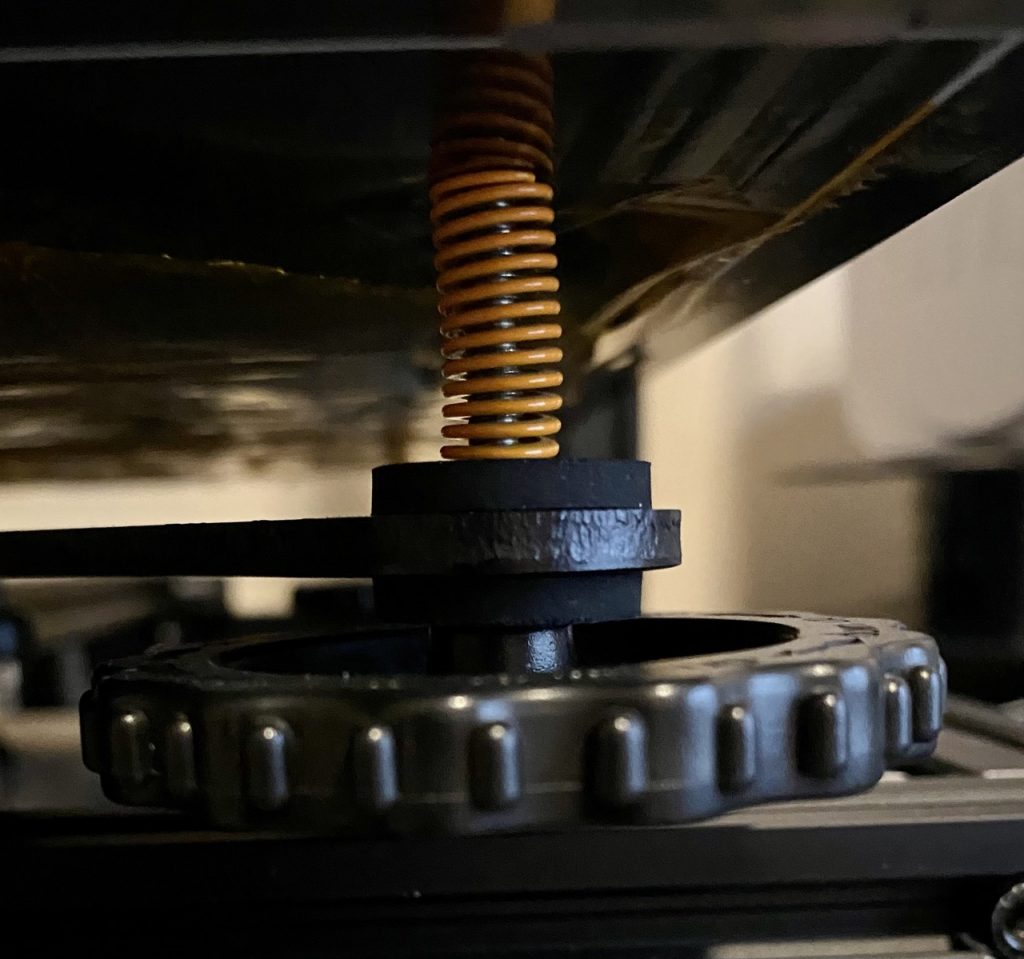
Rubber Washer Bed Leveler Enhancement:
Bed leveling is probably the biggest flaw with this printer. We’d literally had to re-level the bed after every single print. If the print took more than a couple of hours, it wasn’t uncommon for one of the leveling wheels, usually the front right one, to fall off from the vibrations and be found on the floor somewhere.
However the solution was pretty simple, and extremely cheap. A pair of rubber washers on each post, as pictured, virtually eliminated the problem, now we only have to level the bed every one to two weeks at most.
The washers we used were 1/8″ thick, and measure 3/4″ across with a 1/4″ hole. Blue LockTite might also be a good solution.
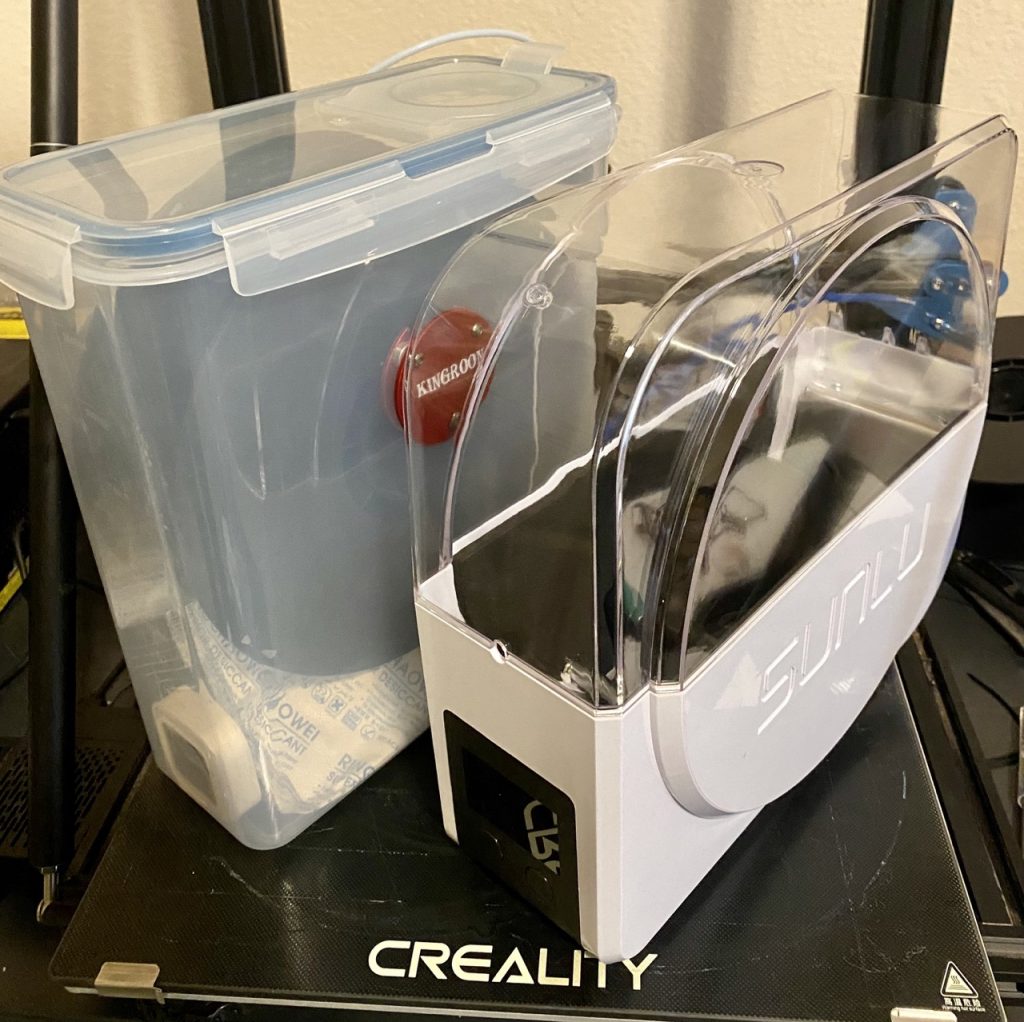
Filament Dryer Box:
I use most PLA, and PLA soaks up moisture in the air, making it extremely brittle. This effects both final print quality, and broken filament has caused me frequent failed prints. I’ve tried two solutions so far:
Kingroon Filament Dryer Box:
The Kingroon Dryer Box relies on Silica Gel, but works reasonably well. It has a built in LCD that shows temperature and humidity. When I first set it up and added the Silica Gel, over the period of a couple of hours the humidity in the box dropped from 46% to 18% and then stayed there, and I haven’t had any broken filament since. The downsides are you need to periodically replace the silica gel, and after about a week the display stopped working and just showed “LLL” instead (but it still worked).
SUNLU Filament Dryer Box with Fan:
This is a much more expensive solution, and drys the Filament using heat. It does work better, have had zero issues and you don’t need to replace the Silica Gel, so if you are doing a lot of printing it’s probably worth the additional cost.
The additions above make a big difference to the utility of the printer; what else do I need?
UPDATE 12/16/2023: Needed to add a second printer, so after some research ordered a Bambu X1C. Bottom line it’s faster, high quality, more versatile, lower maintenance, so a second X1C rapidly got added, and the CR-10 is currently acting as a shelf. Not planning on spending any more time upgrading it.